I had been intending to write a "read through" review of The Chicago Way. I had even started doing so. Then today I had a thought. Why not play a solo game? It might cheer me up as I've been off sick with what seems to be 'flu for a couple of days. A quick check on the website for Great Escape Games showed me that they have posted
PDFs of the markers, roster sheets and QRS, which I promptly downloaded (and cut out the markers and driving template). I then set up some terrain on my (currently clear) painting desk and checked the scenarios in the back of the rules, deciding on "The Massacre" as the best option. I then filled out a pair of roster sheets and sorted out the figures and dice I'd need.
However, let's skip back to a quick rules review before we start on the AAR. The rules have been developed from their already successful Dead Man's Hand, although there are some differences and additions.
This is what you get in the basic rules package:
- 48 page soft-cover, full-colour rulebook
- Deck of cards
- A3 campaign map of Chicago
- Photographer figure (only available for early buyers?)
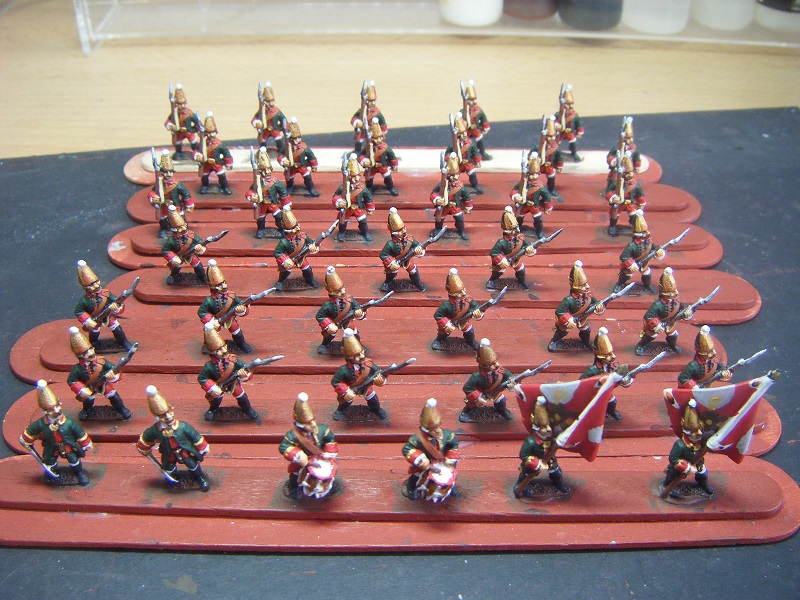
Great Escape Games also sell a range of figures, vehicles, terrain (from 4Ground) and MDF markers and driving templates to go with the game. Judging by the photographer, the figures will fit well with the Blue Moon, Dixon and Pulp Figures ranges; slightly shorter than Copplestone; bigger than Brigade Games.
The rules are well laid out and mostly clear. There were a couple of things that either weren't clear or which needed reference to other sections.
What you will need to play:
- The rules, obviously
- The cards
- Dice - a few D20s and a D10 each
- Markers & template - either the MDF ones or you can print the download on card and cut them out
- Figures - you don't need many to start with; the game is designed for 3-15 models per gang
- Terrain - buildings, etc to provide cover and block LOS
- Vehicles - not absolutely necessary for most scenarios, but they do make the game look better and can provide cover
- Playing space - you can get away with 2' x 2' for some scenarios, up to 4' x 4'
Initiative/Activation order is determined by cards. Each player has a deck of 23 cards - all the red/black 2-10 cards and joker, plus the Jack, Queen, King and Ace of their faction's suit (hearts = prohibition agents; diamonds = cops; spades = moonshiners; clubs = gangsters). The face value of the cards is used to determine initiative/activation order for the models - aces are high, jokers are normally low*. Where two or more cards have the same face value, the tie is broken by rolling D20s.
* If a player's model has the joker for activation it can go last for the full three actions or interrupt the sequence at any point and take two actions.
Each card also has the text for a special effect. For the 2-10 cards these are the same across the suits; the effects for the picture cards and jokers are specific to their faction.
Some cards also have a car symbol with a number in it. These can be used to remove "under fire" markers from vehicles which have been shot at.
Each player first draws a number of cards as determined by the scenario from their deck - these form their "hand". The cards in the hand can be played for their special effect or to remove hit markers from vehicles. Be careful though - you can only replace one card if you have used any during the turn, so if you play more than one in a given turn you will have a reduced hand for the rest of the game.
Each player then draws one card from the deck and places it face up next to a model. The rest of the activation cards are drawn and placed face down until each model has one. If you have a vehicle with models in it, an extra card is drawn. Once all activation cards have been drawn, they are turned face up. Players with vehicles can then assign the cards to the models in them and discard the extra card. There are certain special effect cards and faction special abilities allow you to either redraw your cards or reassign them between models.
Right, back to the AAR. As I told you earlier, I'd decided on "The Massacre" as the scenario for this test game. I also decided that it would be cops v gangsters. To keep things simple, both gangs were identical - a boss/captain, a hitman/sergeant, 3 hoodlums/officers and two thugs/rookies. All were armed with pistols apart from the hitman and sergeant who had pump action shotguns.
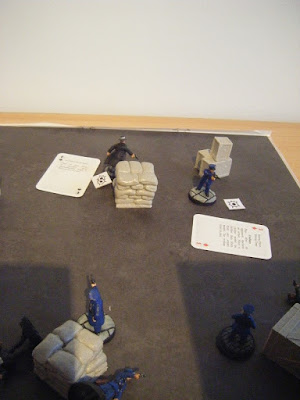
 |
| Starting positions |
The gangsters have a special rule which allows them to move any one model after all have been placed to any other point on the table at least 20cm away from an opponent model.
 |
| The gangsters' first hand cards |
 |
| The cops' first hand cards |
 |
| Initiative/activation cards all drawn |
 |
| Revealed - the cops |
 |
| Revealed - the gangsters |
There were actually several ties for activation order which had to be resolved by rolling dice.
 |
| First activation went to this rookie cop who moved twice and shot at the gangster behind the sacks, missing by miles |
 |
| Next to activate was this punk who moved forward, shot... |
 |
| ...at long range and hit |
 |
| The sergeant moved twice and shot at point blank rang. After all the modifiers the roll was a 19 - instant kill. |
 |
| For this gangster I played this hand card which allowed a free shot before declaring actions. He then took three more shots, all at the sergeant... |
 |
| ...who had to take a nerve test, failing miserably... |
 |
| ...and picking up another hit marker which took him out of the game |
 |
| This gangster took aimed shots at the rookie and scored an instant kill |
 |
| I don't recall who shot the gangster, but the boss decided to lead from the front |
 |
| The hitman rushed forward into cover and fired his pump action - natural "1"; it jammed |
 |
| As did this cop's pistol |
 |
| As the last gangster was activated the cops played this hand card... |
 |
| ...and placed a civvie in the rear of the gangsters |
Onto turn two...
 |
| The cops played this hand card at the start of turn 2 - that's no civvie, it's another rookie copper... |
 |
| ...who was eager to take down some mobsters |
 |
| The gangsters played this hand card as this cop moved forward towards cover, ending his activation in the open |
 |
| New rookie scores his first kill... |
 |
| ...but a dirty rotten crook darts forward and shoots him in the back... |
 |
| ...before darting back into cover |
 |
| The captain comes forward to take a shot at the hitman... |
 |
| ...even with modifiers that's still an instant kill |
 |
| ...and the hitman bites the dust |
And that was turn two, onto turn three...
...after a quick carnage review!
 |
| The boss was the first to activate... |
 |
| ..deciding that his skin was worth more than taking on the cops head on, but they followed him... |
 |
| The captain's pistol jammed |
 |
| This gangster had the joker and chose to interrupt. He aimed and shot, killing the nearest cop |
 |
| Meanwhile a cop darts forward and takes out the mob boss |
 |
| Dirty rotten crook tried the same trick again... |
 |
| But the rookie was prepared for him - the cops laid this hand card... |
 |
| ...and this one, meaning his turn was ended as his two shots were wasted |
 |
| This cop came up to help the rookie out, scoring a hit |
 |
| and the rookie makes it final, scoring his second kill.. |
 |
| ..then makes a move to shoot at the final gangster, but rolls a 1 and his pistol jams! |
 |
| I'd forgotten to take a "big nerve test for the gangsters when the boss died, but remembered for this one - he passed... |
 |
| ...and decided he needed some soft cover, so played this hand card |
 |
| ...to no avail - a cop slipped past to get an open LOS and shot him dead |
The final tally:
Cops - 3 dead from eight
Gangsters - gone to the great speakeasy in the sky
The three turns took me about 2 hours to play, but I imagine games would play much quicker with more than one player and without me stopping regularly to take pics, check rules or look things up on the QRS. A lot of the mechanics were easily picked up and didn't need further reference. I might have forgotten a couple of modifiers, but I don't think they affected any results.
My Impressions After This Solo Test
These rules are good fun. The game mechanics work well and make for an interesting game. There are a couple of rules which could do with clarification. It's not clear whether when drawing and placing activation cards after the first (face up) one if you are allowed to look at them first before placing them face down next to your models. I ended up just assigning them randomly without looking.
Perhaps someone who has played Dead Man's Hand could confirm which method is correct?
The cards and markers, although small, do still add to the clutter on the table. However, you could create your own roster sheet and place the cards with the relevant model's stats, which would help with clutter, but it would make it less instantly obvious which models are due to activate when. Maybe somebody could produce some MDF chits with the relevant face values? You could use those on the table and have a reference sheet for the special effects.
I should note that I deliberately avoided using some of the game mechanisms like ducking back/quick shots when being targeted.
I'll definitely be playing these rules again.
Some Cons
Currently you can only get the card deck with the rules, although it should ab available separately at some point (as they've done with Dead Man's Hand). This is particularly annoying if you have more than one player wanting to play the same faction (who doesn't want to play gangster v gangster?) which means that you will need to buy one set of rules for each player to have enough decks.
Edit - the cards are now available separately at a cost of £10
Rules clarity - some aren't clear, but might be if you've played Dead Man's Hand. For instance, it took a little bit of deduction to determine how each player's deck gets 23 cards - the text in the rules doesn't mention that you get the 2-10 cards of both red/black suits. Also, it might have made sense in the combat section to note that when a model has "under fire" markers equal to its Hits it is "out of action".A third thing that was unclear was whether non-cover terrain (eg lamp posts) counts toward obscuring LOS - the text only refers to models which are partly within the LOS.
Clutter - the markers for movement, hits and out of ammo/jam aren't too obtrusive, especially as you get 1, 2 and 3 markers that are the same size. The cards on the other hand are more obtrusive as I mentioned earlier. I guess it's livable with though, but does affect the visual appeal.
Back to discussing some of the rules.
Activation - each model when activated (normally) has 3 actions*. There are five action types -
Move - up to 10cm per action and up to 8cm vertically. It's not clear if that is in combination, eg moving 10cm horizontally up stairs/slope with 8cm climbed. Any help from DMH players?
It also includes entering/exiting vehicles, driving moves and entering hand-to-hand combat.
Aim - allows you to take an aimed shot for a +1 bonus to your shots this turn (if your weapon allows)
Shoot - pretty obvious. The number of times you can fire per turn depends on your weapon.
Reload/Unjam/Change Weapon - does exactly what it says on the tin
Recover - you can remove 1 "under fire" marker per Recover, provided you aren't "out of action"
Interruption
There are a number of ways that you can interrupt the sequence of play. If one of your models is being shot at, and hasn't yet activated, you can "burn" that model's activation to duck back or take a quick shot. Similarly, if your model is in the path of a moving vehicle and hasn't activated you can burn the activation to duck back out of the way or stand your ground and take a shot - however, you will need to pass a nerve test to do either. If your model has already been activated though, it can't d either and will (probably) get run over.
You can also interrupt the activation order with certain hand cards or if one of your models has the Joker for activation.
Shooting
Easy-peasy - if you have LOS and aren't jammed/out of ammo you can shoot. Roll a D20 (two for both shotgun barrels; 3 for tommy guns at point blank range). Then apply modifiers for the shooter and the target. Natural "1" means the weapon jams; 1-10 = miss; 11-14 = hit, 1 "under fire" marker; 15-18 = hit, under fire marker and nerve test; 19+ = out of action (instant kill).
Nerve Tests
There are two types - individual and gang (Big Nerve Test). Both involve rolling a D10.
Individual nerve tests are taken when the model is shot at and the modified roll is 15-18. If there are any "under fire markers" each gives a -1 modifier; if any friendly models are within 15cm a single +1 modifier is given. If the modified die roll equals or exceeds the model's Nerve, they are fine; if they fail they take an additional "under fire" marker.
The Big Nerve Test is taken when your gang has taken more than 50% casualties. Again a D10 is rolled, modified by -1 for each model lost beyond the 50%. The roll is against the best (ie lowest) Nerve of the remaining models. If you pass, the game continues; if you fail you call it quits.
Where the number of "under fire" markers on your gang is at least double the number of models remaining, the Big Nerve Test is automatically failed.
I haven't played the Hand To Hand or Vehicle rules, so I'll skip past those.
Gangs
Each model has 5 characteristics - Hits, Nerve, Shoot, HTH, Drive. The rules contain tables of base character types for each faction. These also tell you how many of each type your (initial) gang can have, the cost and any weapon options (sometimes at extra cost). You also have listed the special rules for each faction.
OK, I'll admit it. This post has been a bit of a stream of consciousness rambling and not as well structured as I might have liked, but it will do the job. Summing it all up - the rules give a good, fun game but could do with some clarification in places.